| |
| about us |
| products & solutions |
| resources |
| examples |
| home |
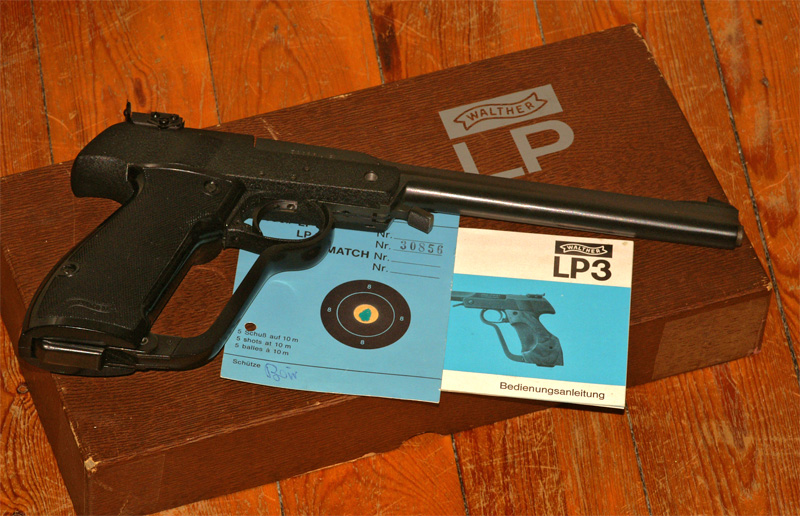
| Servicing a Walther LP3, repair and seal replacment |
This is a walther LP3 air pistol typically well looked after with the original box, manual and test grouping card. But like most LP2s and LP3s the exhaust valve is deadder than a dodo. Unfortunatly as is happening to most Walthers from this age the plastic seals are self destructing due to age leaving it in need of repair. Not only has the O-ring gone but the valve spring guide that was aparently mounted in the valve housing, the O-ring retainer and the exhaust valve seal have dissapeared. The valve fault is common in the LP2s and LP3s but both have very different valve set ups. The LP2 is nicely explained in Hillier Airpistols 3rd ed P172. The LP3 has a totally revised valve, that also went through at least 2 incarnations. Many parts are no longer available, and the parts mentioned here may not match other LP3 variants. The general design is similar throuought, and parts are generally interchangable.
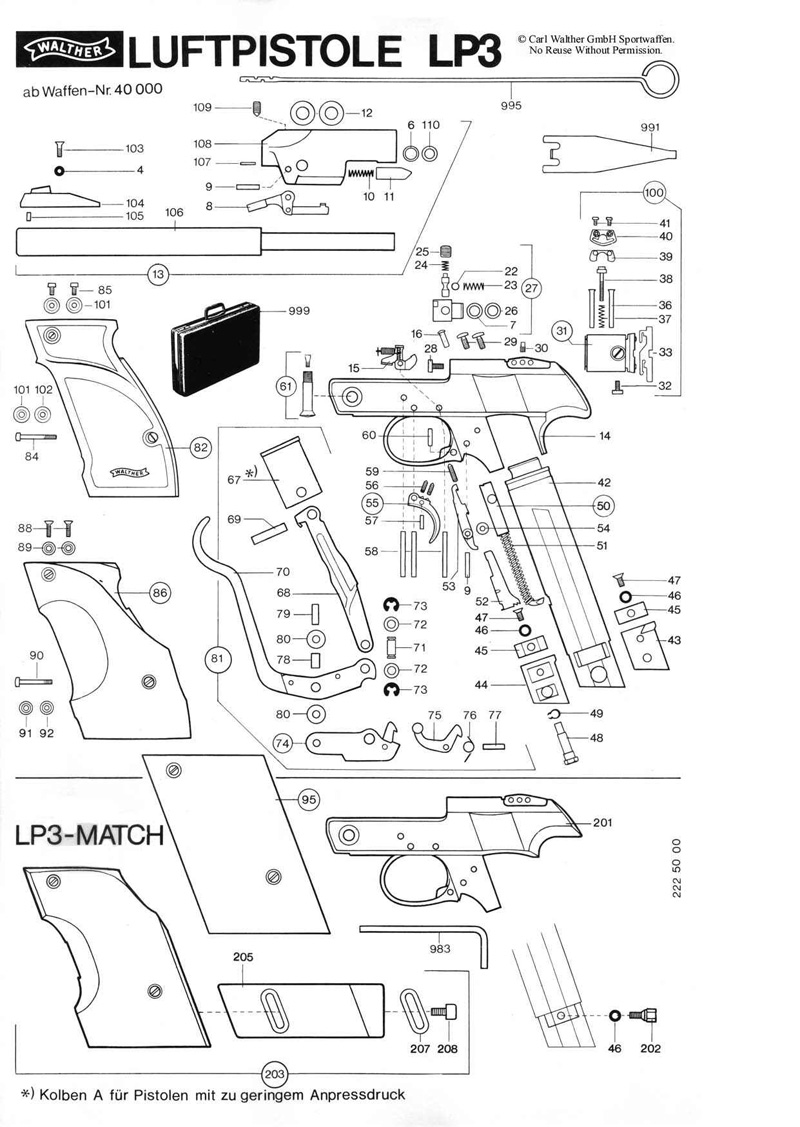
Parts diagram
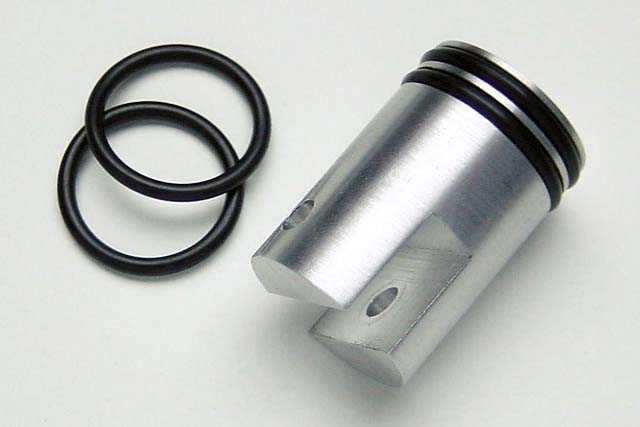
Disclaimer. Do not attempt any of the following instructions unless you are sure that you have followed all safety precautions. The guide represents what the author has performed. It is not in any way meant to be a definitive or safe method to follow except under your own risk. The author accepts no responcibility for death injury or damage to person or property. Procedure for replacing the exhaust valve seal. To access the exhaust valve it is necessary to: Remove the barrel by opening the breech, unscrewing the locking screw and barrel pin (61) being careful of the washers (12) between breech and barrel block (106). Cock the pistol without returning the cocking lever (70). Remove the valve stem retaining screw (25) and spring (24) and valve stem (number not shown). Remove the exhaust valve housing retaining screw (28) and the exhaust valve housing being sure to catch the exhaust valve spring (23) and bearing (22). Loosen the two cylinder retaining scerws (29). Make sure that the firing pin (16) does not fall out and the gun is not decocked. The valve and housing should be reassembled with the components pictured below. Depending on the model variant it may be necessary to remove the decaying rubber from the valve housing and turn a new valve spring guide (sub component of 27 not illustrated in the original parts diagram).
The brass spring guide will have to be fabricated for models with a moulded in seal. The dimensions are as follows; ID 6.1mm OD1 7.97mm OD2 9.47mm total length 7.22mm length of rim 1.04mm. The length is critical as the guide also functions to compress both seals for an air tight compression chamber. The length stated is correct for the model with the moulded in valve seal with the seals illustrated but may vary in othe models. The bearing exhaust valve seal can still be obtained with other seals from JG Airguns in Mundelein IL. The dimensions are as follows; OD 8mm ID to shamfer 5.4mm ID 4.6mm thickness 1mm, Material probably polyurethane. . Lawrence Amatruda the extant LP3 specialist based in England custom fabricates spring guides and exhaust seals. Place the exhast valve seal in the valve housing (27), then place the bearing in the housing flush with the seal. Place the newly fabricated or original spring guide in the valve housing and the spring in the guide. Place the O-ring (7) in the pistol as far into the recess for the exhaust valve housing as it will go. Reassemble in the reverse order of dissassembly but only tighten to finger tight on all screws. The O-ring (7) is difficult to compress sufficiently to allow the exhaust valve housing to be seated fully. Therefore it can be usefull to close the barrel before serewing the exhaust valve housing retaining screw (28) entirely and leave over night before fully tightning all screws. Do not tighten the valve stem retaining screw (24) untill the valve housing has been completely seated and the stem guide is visable in the center of the screw hole. Finally tighten the two cylinder retaining scerws (29) and adjust the valve stem retaining screw (24). Procedure for replacing the piston seal. Remove the three screws retaining the grips and the grips them selves. Hold the gun by the cylinder upside down so as the barrel is pointing away from your stomach and place both thumbs on the hammer spring retainer (52). Push down and forward on the spring retainer and remove. Remove the hammer and spring assembly. Rotate the cocking lever (70) so as its pivot (48) is no longer under stress. Remover the small circlip (49) and pivot. Unscrew both screws (47) and remove inserts (45) keeping seperate so as they can be replaced in their respective sides. Remove the pivot housings (43) and pull the piston out from the cylinder.
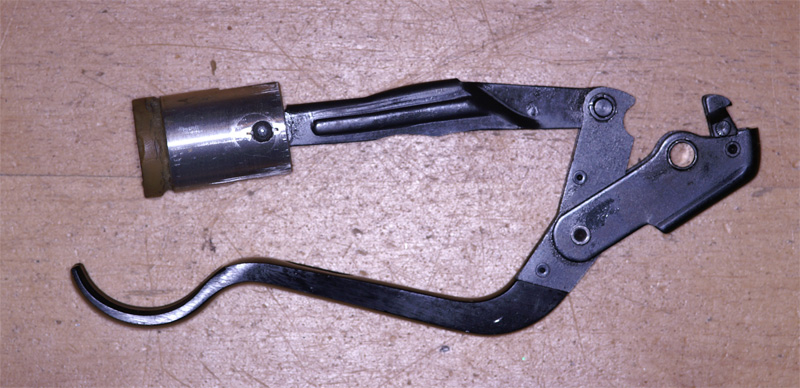
Original Walther Piston
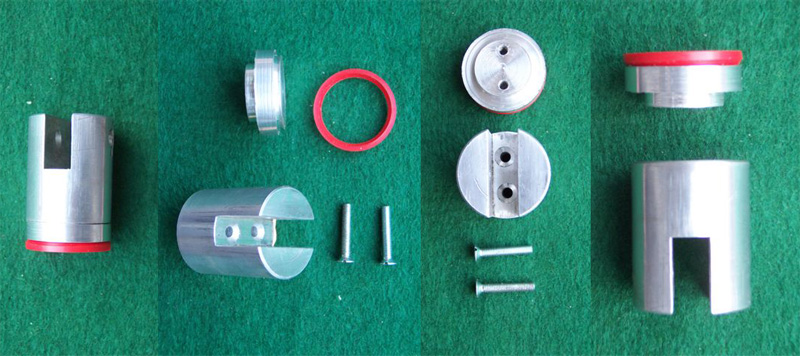
Piston Crown modification
Piston replacement If the piston is constructed with a moulded in seal it is necessary to construct a new piston and use an O-ring seal. Fabricating a new piston crwon and retaining the old piston allows retention of the original parts and use of the newer piston seals.The replacment piston with two O ring seals can be purchased from Kueng Air Guns. Lawrence Amatruda in England can also fabricate and replace these pistons. The piston will have to be made exactly the same size as the original piston and seal. Piston dimensions D 24.83mm H 37.87mm, gudgen pin diamiter 5mm. gugen pin axis from bottom of cylinder 7.3mm, connecting rod slot width 7.8mm depth 15.3mm. For the original piston seal and those suppliled by JG Airguns a slot should be cut around the circumference of the piston near top (starting approximately 0.4mm from piston crown) at 45 degrees from piston axis with a depth of 3mm at the deepest point and a width of 2 mm. The O-ring dimensions are as follows ; OD 25.2mm, ID 19mm, height 3.6mm it is probably constructed from polyeurathane. The top and bottom faces are at aproximatly 45 degrees to the central axis angled out towards the top of the piston. Any space above the piston contributes to the compression chamber and reduces the compression ratio and hence the power output of the air pistol. Therefore it is critical that the O-ring is as near the top of the piston as possible and that the piston crown fits the cylinder as closely as possible. To these ends it is advisable to use a very small shamfer on the piston crown and ensure that the crown is as flat as possible. If the piston has been machined between centers it is advisable to grind the surface flat after removal of the centers.
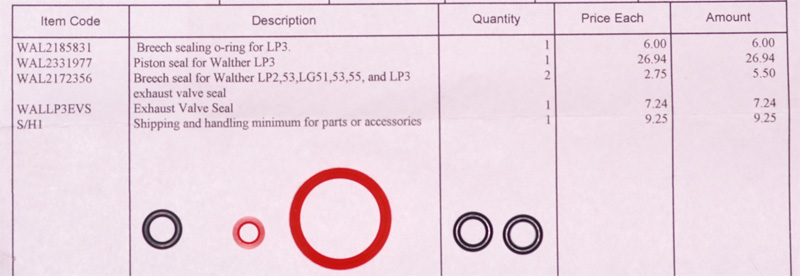
Replacement piston The piston assembly is replaced in the reverse order as for dissasembly. Before replacing the circlip test the ease of cocking to ensure correct adjustment of the asymmetric pivot part 48. If cocking is difficult or slack rotate the pivot through 60 degrees and test again. As mentioned above seals are avilable from JG Airguns, Chambers the gunsmiths and Lawrence Amatruda UK. The breach seal should also be inspected and replaced if necessary but does not deteriorate through age in the same manner as the other seals. The following picture includes prices of seals (correct in autumn 2006) and their part number as supplied by JG Airguns It was not possible to obtain replacement pistons or spring guides at the time of writing.
Acknowledgements Lawrence Amatruda for great patience in explaining all the difficult bits to a novice, many thanks Laurie. Troubledshooter for tech assistance and providing references. John Groenewold of JG Airguns, for advising me what parts were still avilable what to order and how to replace them. Erik the viking for providing pitures photos and dimensions from the original and Caro for letting me play with my toys in the evenings. For further information feel free to contact Timothy Evison at timevison@hotmail.com |